How to Install a Direct Burial Lamp Post: A DIY Guide for Homeowners
Step-by-Step Instructions and Tips for a Successful Installation
Published on
April 11th, 2023
Adding a lamp post to your front yard can improve your home's safety, security, and aesthetic appeal. Installing a direct burial lamp post is a fantastic way to achieve this, and it's a project that homeowners can tackle on their own with some basic tools and a little know-how. In this article, we'll walk you through the steps to install a direct burial lamp post and provide helpful tips to make the process smoother.

Canterbury LED Post Light and Classic Black Lamp Post with Crossarm
What You'll Need
Before you begin, you'll need a few tools and materials. If you're still searching for the right lamp post or light, check out our handy post light buying guide.
Shovel or post-hole digger
Concrete mix
Level
Screwdriver
Wire nuts
Electrical tape
Wire strippers
Circuit tester
Step 1: Choose Your Location
The first step is to choose the location for your lamp post. Consider the height of the post for your space. A six-to-eight-foot lamp post provides plenty of light without spilling into your neighbor’s yard. It’s also important to consider the type of bulb you'll be using and any potential obstructions in the area. Once you've selected the location, mark the spot with a stake or spray paint.
Step 2: Turn Off Power
Always remember to turn off the power to the electrical item you’re working on.
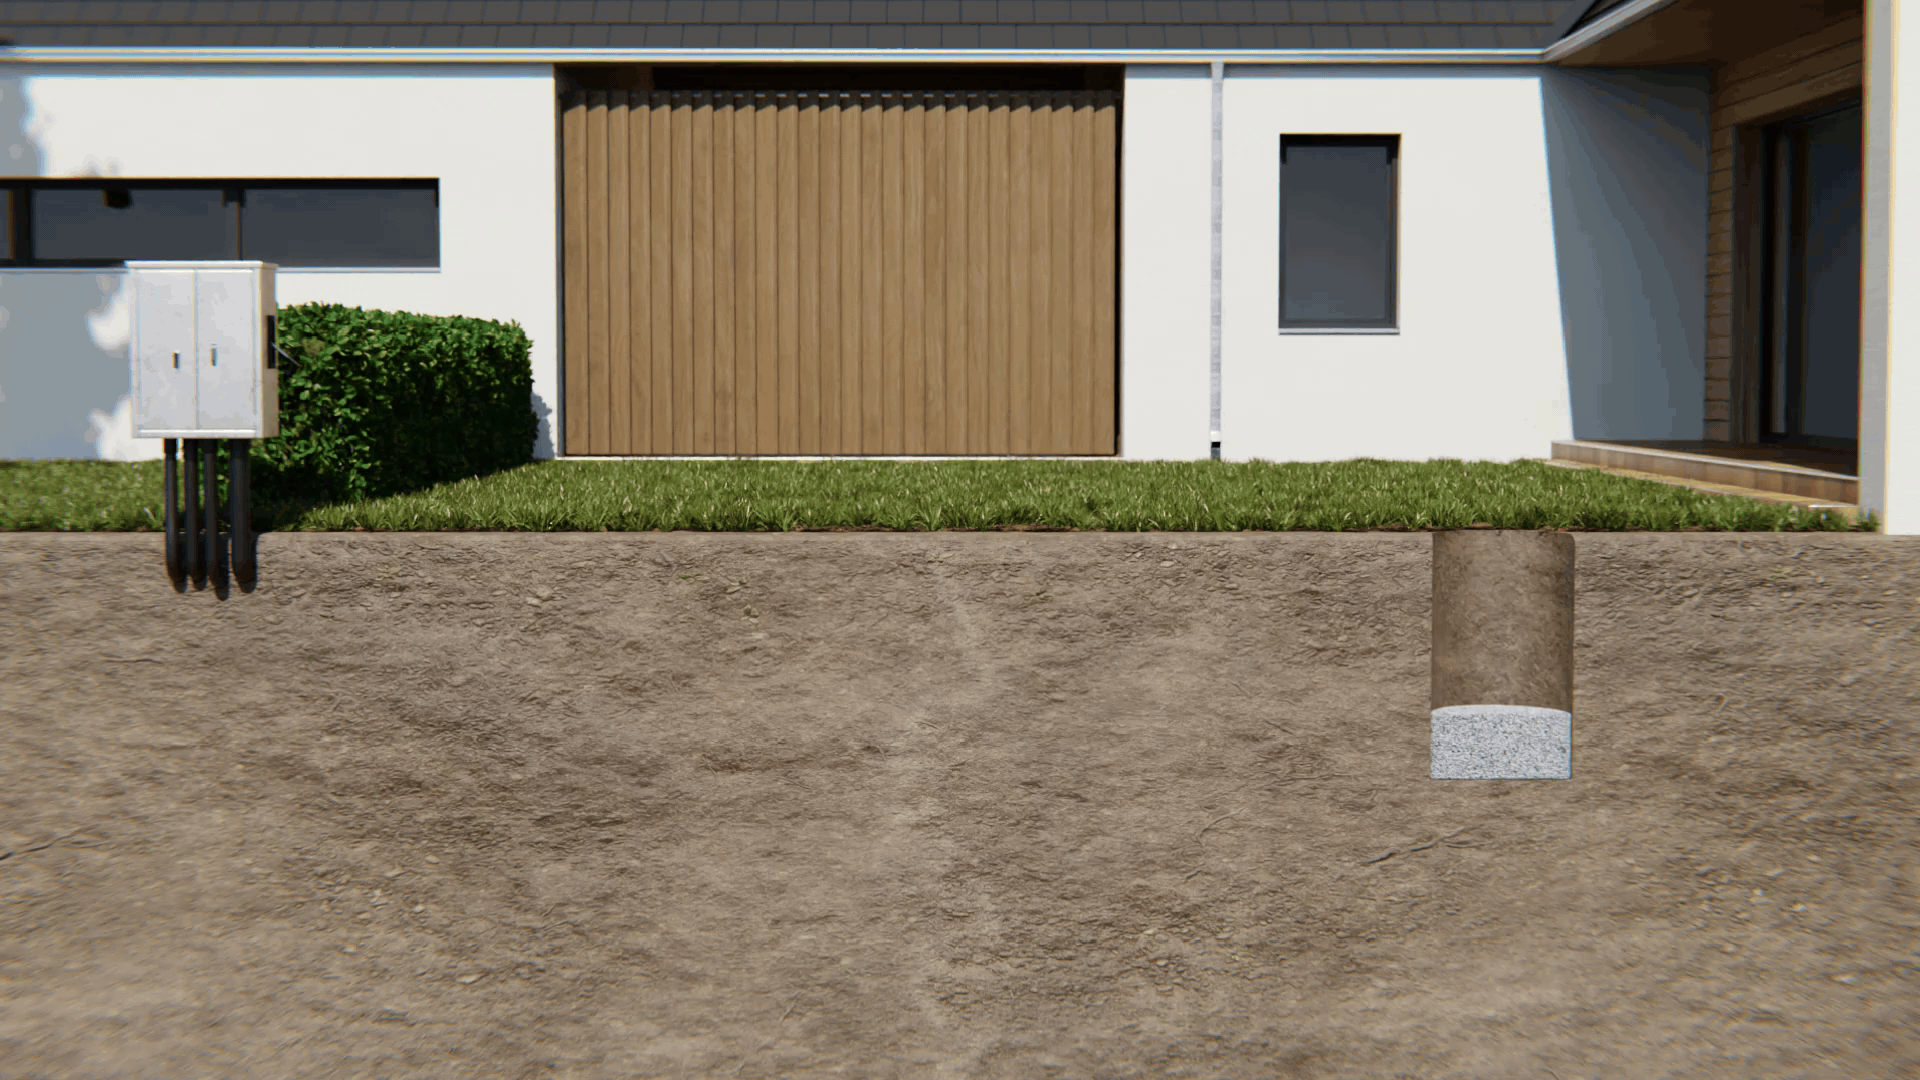
Step 3: Dig the Hole for the Post

Using a shovel or post-hole digger, dig a hole that is at least 18 inches deep and 8 inches in diameter. Fill the hole with 6 inches of gravel.
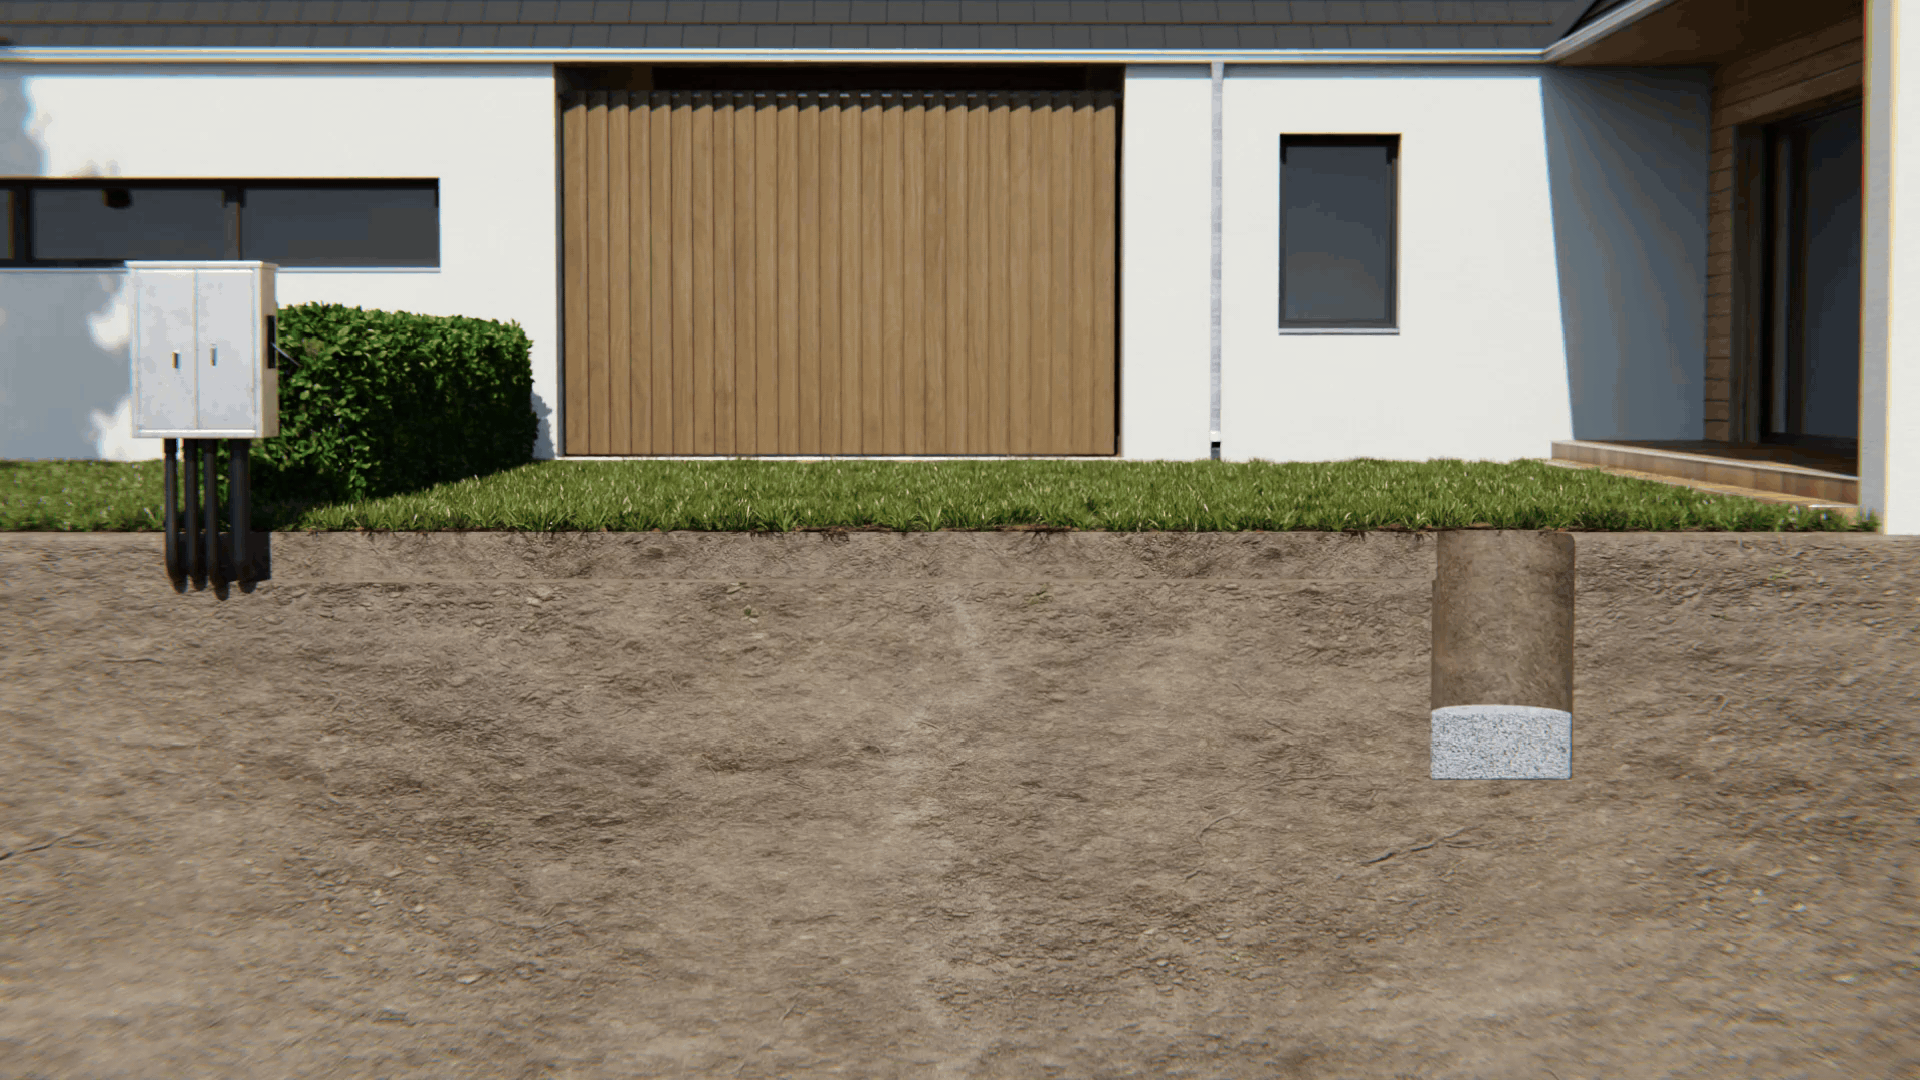
Step 4: Dig the Trench for the Wires
Using a shovel or post-hole digger, dig a trench from the power source to the lamp post hole. The appropriate depth for burying conduit may vary based on local electrical codes. However, a general rule of thumb is to bury PVC conduit at a depth of 18 inches, direct wire burial at 24 inches, and RNC (rigid non-metallic conduit) at 6 inches.
Pro Tip: To make refilling the trench easier, place the soil on a plastic tarp as you dig.
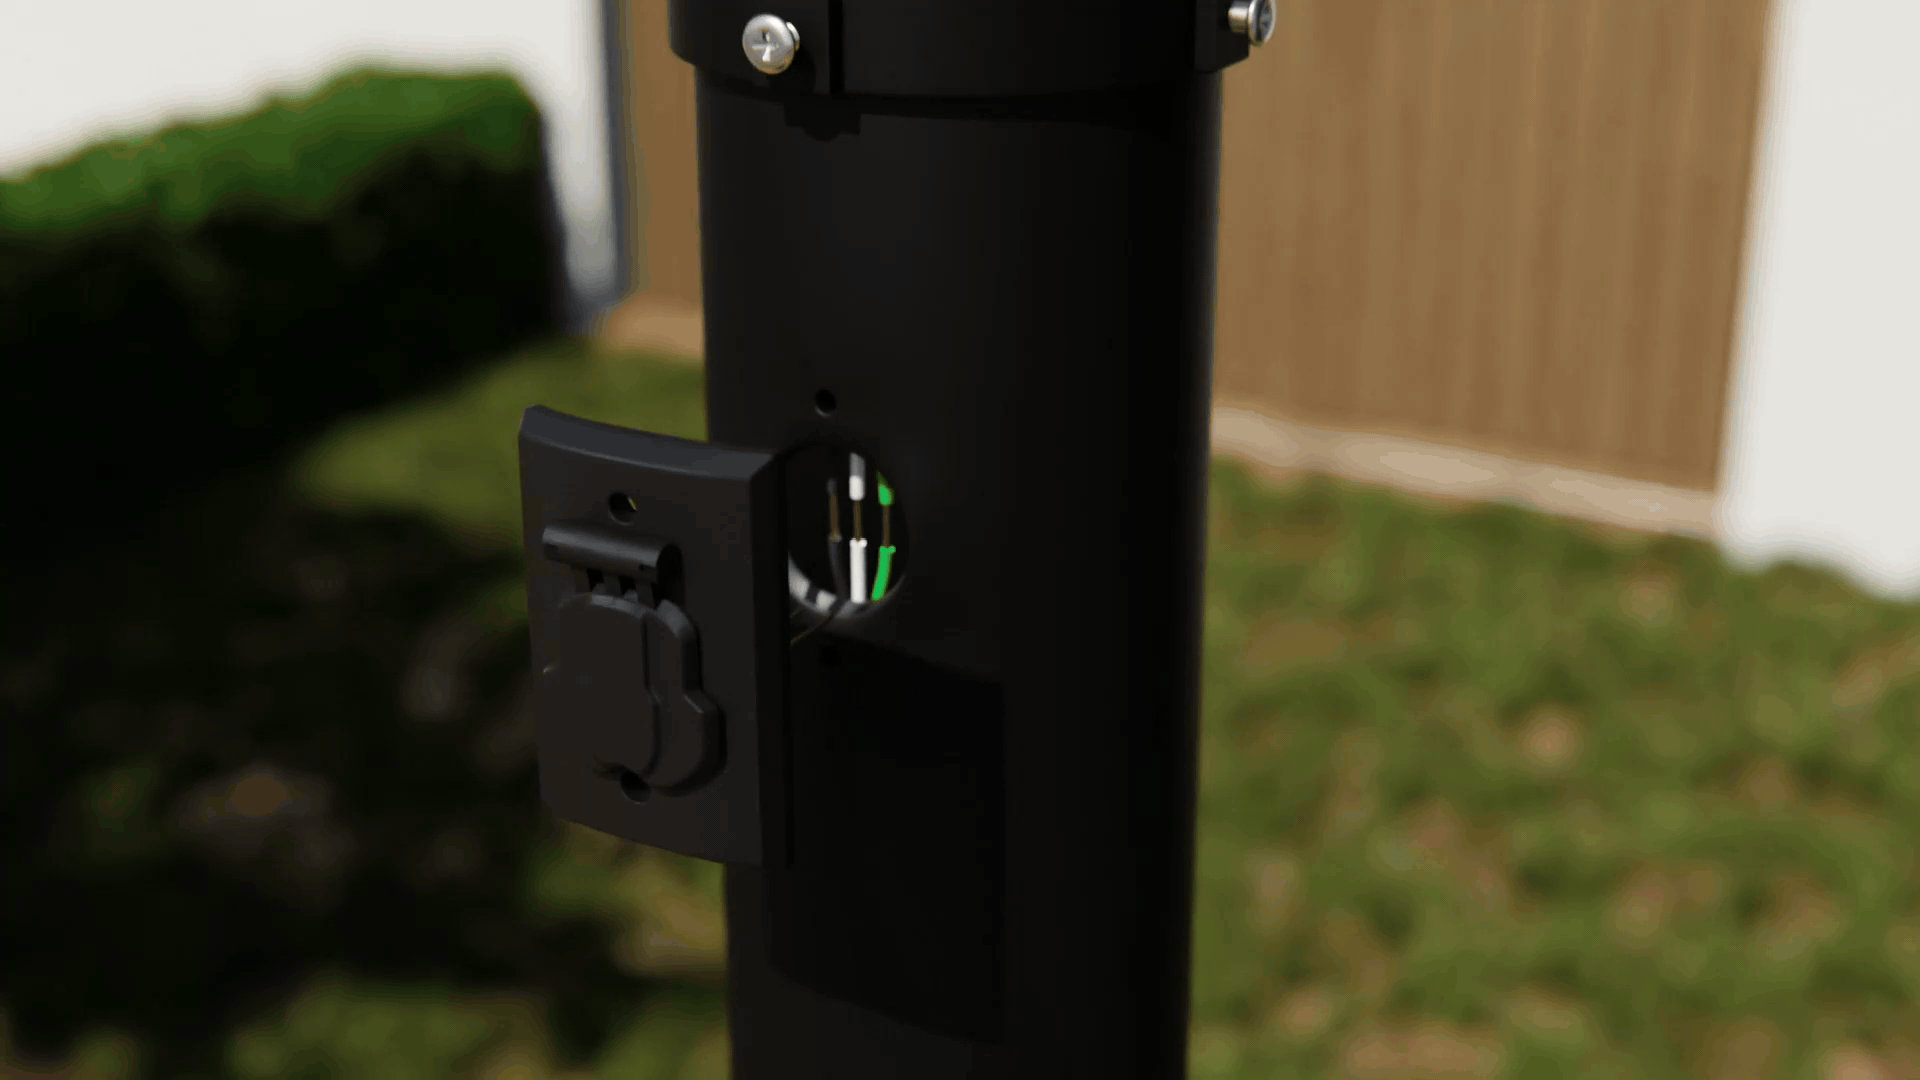
Step 5: Connect the Wires
Run the wire through the trench, making sure that it is protected by conduit piping. Feed the wire through the lamp post inlet hole and to the top of the post.
Check with local authorities for specific electrical code requirements for your location.
Step 6: Install the Lamp Post with Concrete

Insert the lamp post into the center of the hole in the ground and make sure it is level. Then fill the hole with concrete mix to just below the wire inlet hole at the post base.
Step 7: Test the Lamp Post
Before turning the power back on, make sure that all connections are secure and that the wires are properly insulated. Once you're confident that everything is in order, turn the power back on and test the lamp post to ensure that it's working correctly.
Optional: Outlet Installation
To wire the outlet, first connect the black outlet wire to the black power supply and post top wire. Connect the white outlet wire to the white power supply and post top wire. Then connect the green outlet wire to the power supply and fixture ground. Finally, screw the outlet kit to the lamp post.
Optional: Photo Eye Installation
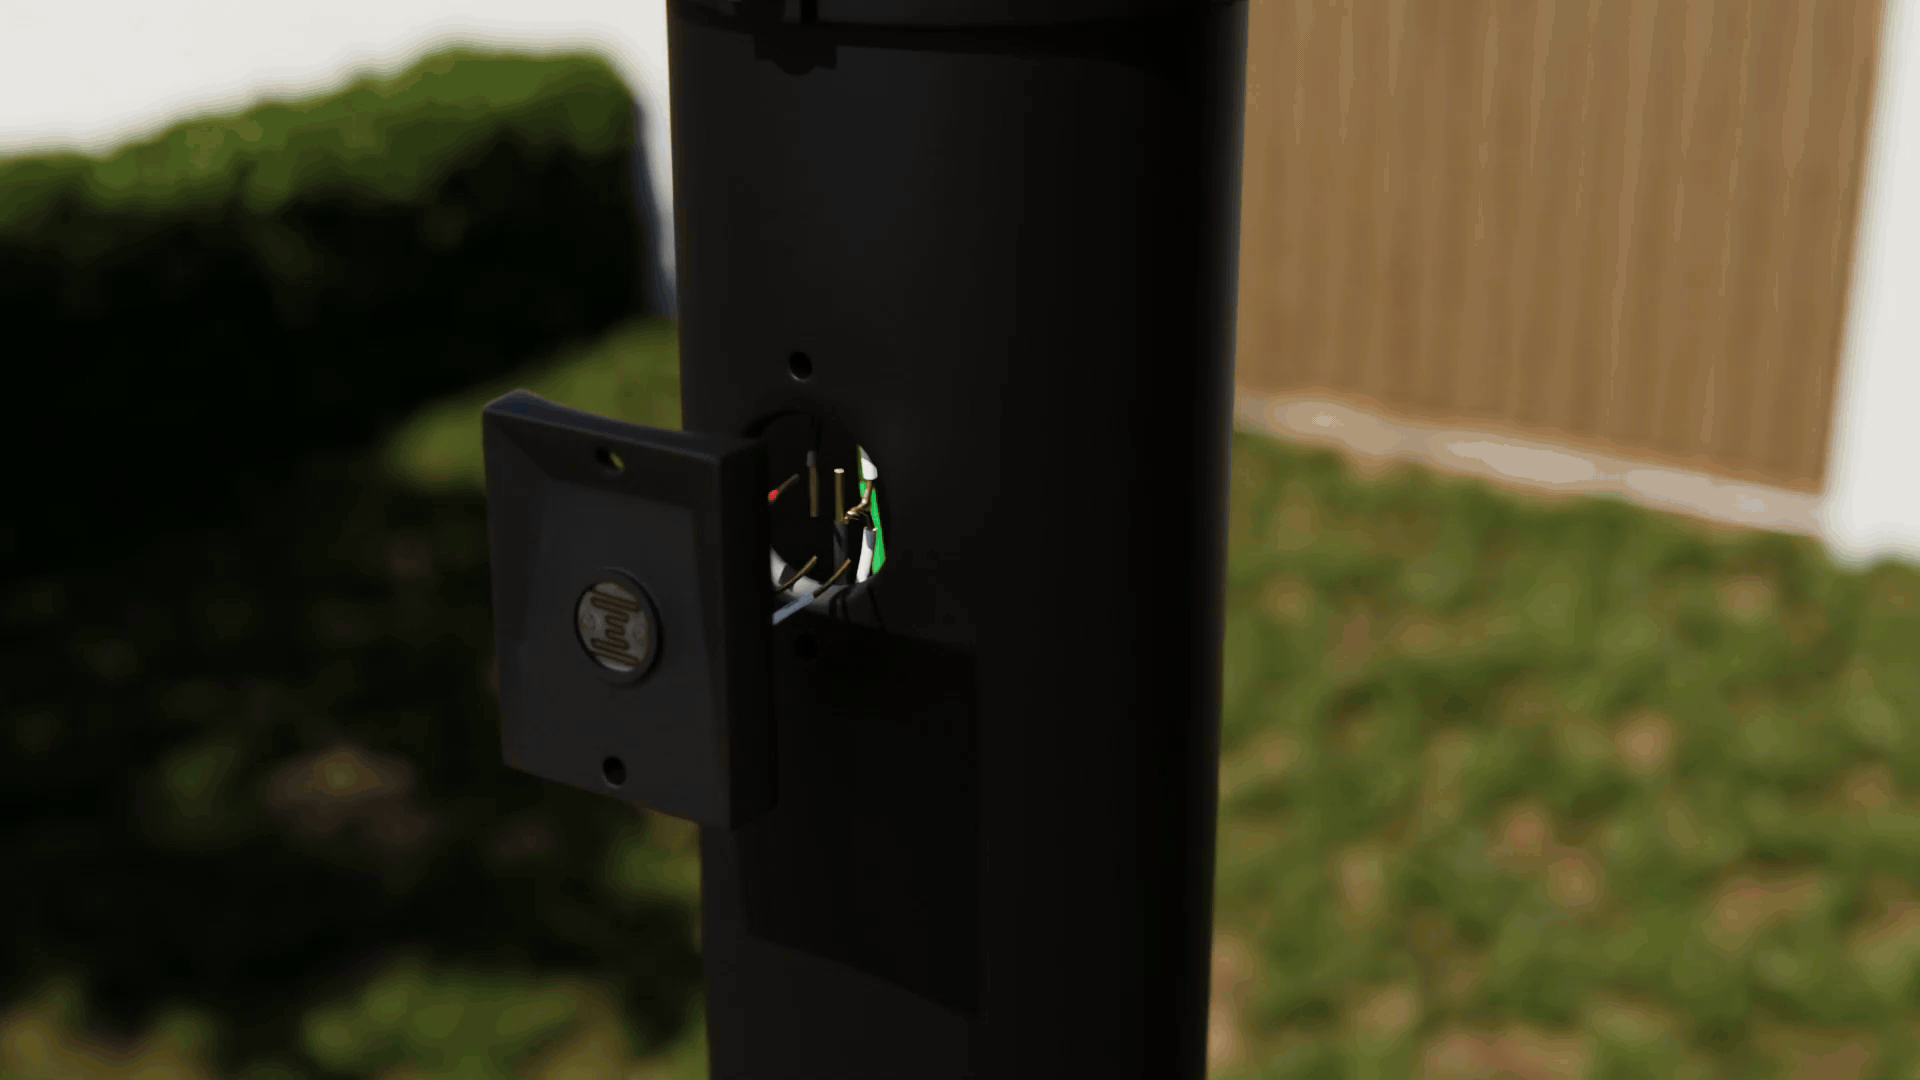
To install a photo eye to your lamp post, connect the black photo eye wire to the black power supply wire. Connect the red photo eye wire to the black post light wire. Then connect the white photo eye wire to all other white wires. Finally, screw the photo eye kit to the lamp post.
Installing a direct burial lamp post is a great DIY project that can enhance the safety, security, and aesthetic appeal of your home. With a little bit of effort and some basic tools, homeowners can complete this project and enjoy the benefits of a well-lit front yard. Whether you choose the Design House Lamp Post with Photo Eye or the Design House Lamp Post with Convenience Outlet, you can be confident that you've made a wise investment in your home's exterior. So, why not get started today and illuminate your home's front yard with a beautiful new lamp post?
Recent Resource Guides
The Value of Shopping from a U.S.-Based Company
When it comes to shopping on Amazon, many shoppers in your position are looking for a reliable and hassle-free experience. You want the convenience of quick, responsive customer service and peace of mind knowing that your purchases are ethically sourced and meet safety standards. At Design House, we take pride in ethically sourcing sustainable Brazilian pine wood for our vanities. Additionally, our lighting and plumbing products come with various safety certifications, ensuring they meet the highest industry standards. With so many overseas sellers flooding the marketplace, it's easy to feel uncertain about where your money is going and whether you're getting the service you deserve. This is where Design House stands apart, because we are a proudly Wisconsin-based, U.S.-based company committed to offering a better, more trustworthy choice. Having been around for over 150 years, we know the value of maintaining a long-standing tradition of quality and service.
Refresh Your Home Without a New Installation
Home updates can often feel overwhelming and expensive but refreshing your space doesn’t always require a complete overhaul. Sometimes, small changes can make a significant impact. In this post, we’ll explore four simple upgrades that can breathe new life into your home: updating your bathroom vanity lighting, swapping out the glass globe on your ceiling fan, upgrading your kitchen cabinets with soft-close drawer glides, and replacing the USB charging outlets in your furniture. All these replacement parts and more can be found in our Parts shop. Let’s dive in!
Boosting Your Vacation Rental’s Revenue with Easy Upgrades
In the competitive vacation rental market, creating a standout experience is essential for driving 5-star reviews and maximizing income. Whether you are working with Airbnb, Vrbo, or are listing on your own, Design House has options for you to distinguish your property from the competition. Here are some tips to make a big impact on your business.
Comprehensive Guide to Design House Kitchen Cabinets
Design House kitchen cabinets offer a blend of style, durability, and functionality, making them a top choice for any kitchen renovation. Whether you're looking to update your space or install cabinets in a new kitchen, Design House provides high-quality options that meet various needs. This article will provide an in-depth look at the features, maintenance tips, and certifications for Design House kitchen cabinets.
The Ultimate Guide to Design House Cultured Marble Vanity Tops
When it comes to bathroom renovations, selecting the right vanity top can make a significant impact on both aesthetics and functionality. Design House vanity tops with integrated sinks are a popular choice for homeowners seeking a seamless and stylish bathroom upgrade. In this blog article, we'll delve into the features, benefits, and maintenance tips for these high-quality vanity tops.